Free Shipping
Telescoping Truck Camper Plans
Build a Low Profile Slide In Camper for Truck Travel
|
Telescoping Truck Camper Plans
Build a Low Profile Slide In Camper for Truck Travel
 |
PDF Format |
|
|
All Orders Processed
On a Secure Server
|
Price $12.95
|
|
Get a restored copy of these vintage Telescoping
Truck Camper Plans with 15 Pages of Enhanced and Enlarged Figures
and Illustrations and Searchable Text.
|
We will email these plans, to the address provided
with your payment, within 48 hours following receipt of your order.
|
|
|More
Vintage Trailer Plans|
|
|

|
|
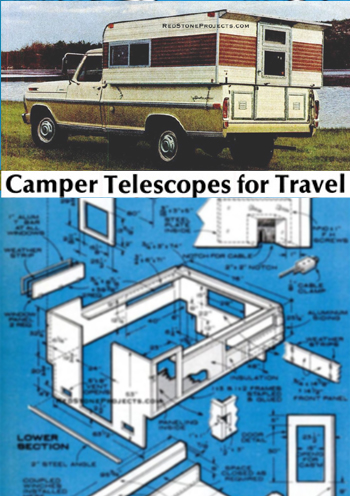
Big Inside, Camper Telescopes
for Travel
Concealed winches and cables stretch it out again
to hold four people at the campsite.
|
| You will be proud to call this sleekly finished camper
your home on the road. Prefinished hardboards panels give the interior
a warm atmosphere, as well as one that's easy to keep clean. Aluminum siding
and fiberglass-batt insulation ensure that the interior stays warm in another
sense, too. Or cool, in desert heat.
There are plenty of cabinets and lockers to hold your
travel equipment, yet lots of room is left for the custom installation
of a sink, icebox, stove, and portable toilet.
For sleeping, the dinette table drops down to form part
of a double transverse bunk. Shelves fold out to form a strong upper berth
for another two people.
And the best news: It all costs you well under $1000 to
build. Thet ups the enjoyment.
- W. A. Flanagan |
|
|
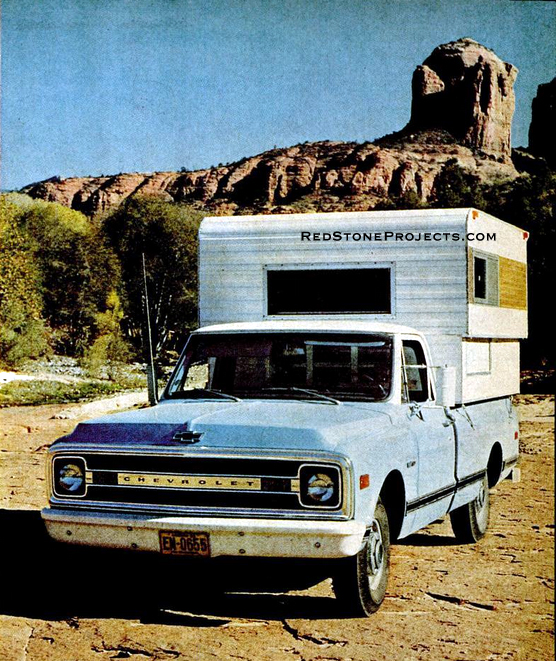
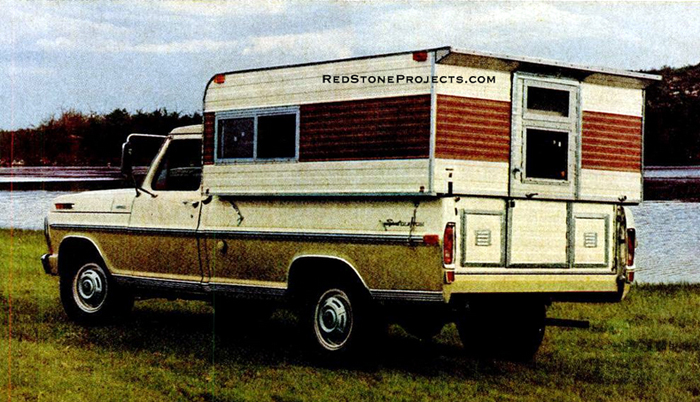
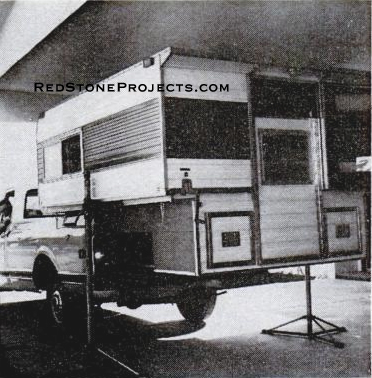
Low profile of this camper when telescoped offers
less wind resistance. Your pickup will pass up more gas stations and feel
crosswinds less, too, than if carrying a cab-over model. Cranked up for
the night, the camper boasts 74" of headroom. With built-in stove, icebox,
cabinets, sink, and toilet, it still sleeps four. You can customize the
interior to suit your taste.
|
Inside the Telescoping Camper
By JIM ABBOTT
|
|
|
|
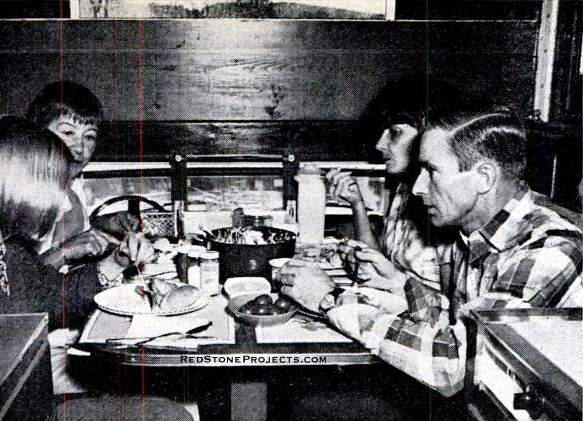
There's plenty of room to feed and sleep two couples,
and stow their gear. The camper offers all the comforts of your home -
and its construction is similar.
|
|
|
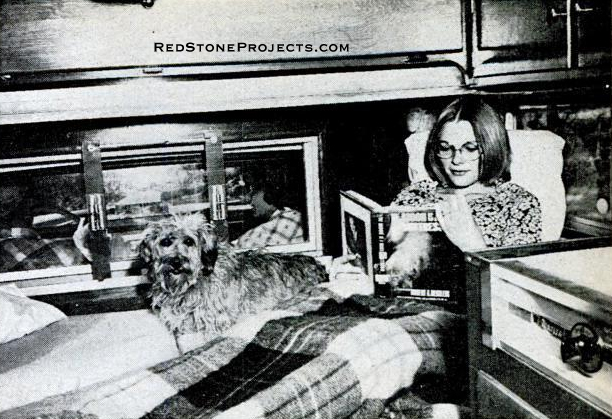
Eating and sleeping space inside the raised top
accommodates four people - with a cozy fifth optional.
|
|
|
|
|
Front edge of the dinette table folds up for access
to seats. Lower berth, occupied by author's daughter at right, consists
of seat backs, folded down, with space between them bridged by the lowered
dinette table.
|
|
| Interior walls are 1/8" hardboard wall paneling, which
gives you a wide choice of prefinished colors and textures. Outside, the
camper is sheathed in aluminum house siding (also pre-finished in colors)
to save you painting and maintenance. The two layers sandwich between them
an open frame that you can insulate with fiberglass batts. |
|
|
Wide plank over the far end of dinner table is
actually three hinged planks which fold out, as at right, to form an upper
berth. Upper is wide enough for two children or one adult. Floor space
is ample for another adult on an air mattress.
|
| Plan Ahead
Dimensions given here are for the camper I built to fit
in a 1969 Chevrolet pickup. It should fit in many other models, but measure
your truck box before starting and adjust the plans if necessary. (You
could even adapt the telescoping feature to a small travel trailer.)
Construction starts, logically, with the foundation: the
floor pan. It's mostly 3/4" plywood, nailed and glued at the joints. Here
again you want to plan carefully - some of the interior furnishings can
serve double duty as part of the floor pan. The sides of the sink and icebox
replace the 8 1/2" by 11 1/4" end panels, keyed No. 3 on the construction
drawing.
With the foundation completed, check the dimensions for
agreement with plans and truck bed. Then, build your walls to fit this
floor.
One of the best ways I've found to make the wall frames
is to cut out the framing pieces and lay them on a flat surface. Apply
white glue to the joints and fasten with pointed staples. Turn the frame
over, carefully, and staple the other side, the same way.
Framing is 1" stock (3/4" finished thickness). Most pieces
can be 2" wide, but allow extra for corners, window posts, and an on. Use
a good fir or pine, preferably kiln-dried. |
|
| |
Get a restored copy of these vintage Telescoping
Truck Camper Plans with 15 Pages of Enhanced and Enlarged Figures
and Illustrations and Searchable Text.
All Orders Processed
On a Secure Server
|
Figure
1. Construction and Dimensions
|
|
| Frame design isn't critical, so you may want to rip boards
to widths different from those indicated. At the ends, and particularly
at the rounded comers of the upper section, 3/4-ply can reduce the complexity.
Immediately apply the interior panel, using white glue
and nails or contact cement. Note that the side panels are right and left-handed:
Don't make two of one kind. Cut out window or door opening after the panel
is in place. Leave the insulation and siding for after assembly.
Curve the front ceiling panel by steaming it (a steam
iron will do) until it will follow the bend. Then fasten with glue and
3/4" screw nails to the underside of the roof frame. Drill holes through
frame for wires to the lights before adding the larger ceiling panels.
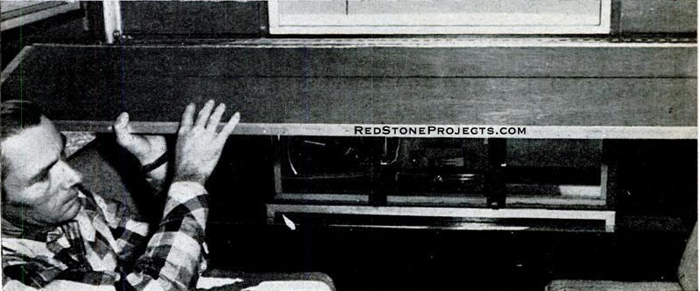
Wires to the upper section pass through a 3/4" flexible
tube hanging from the right-rear comer of the ceiling. A weight draws it
into a space behind a lower cabinet as the upper section telescopes down. |
 |
|
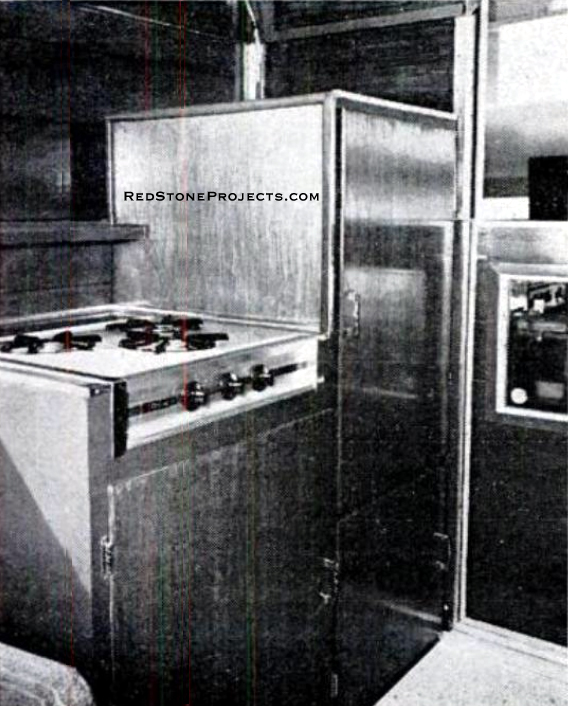
Drop-in stove tops off cabinet that also holds
icebox below. Big corner cabinet holds bulky items like sleeping bags.
|
| Lifting Mechanism
A pair of boat trailer winches on the left side of the
lower section draw in two 1/8" cables each. These cables pass over 3" pulleys,
high in the lower section, to the bottom corners of the upper section of
the camper.
As the cables wind up on the drums, they raise the top.
Two ball bearings in each corner of the lower section project out about
3/8" to keep the sections from binding.
The right-rear cable passes under the door through a rabbet
in the threshold. The prototype of this camper (shown in the photographs)
had variable pulleys and turnbuckles to level the top by adjusting cable
length. It turns out simpler and just as easy to move the clamps on the
ends of the cables.
Another possibility is to route the front cables to the
rear winch; but you'd lose the safety advantage (double lock) of the second
winch. |
|
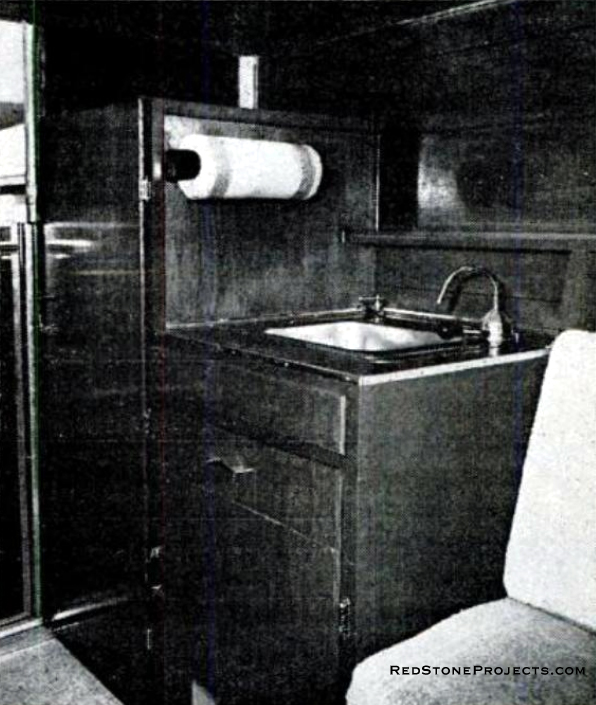
Sink and water tank share the section in front,
with storage
to spare. Clothes hang neatly in wardrobe.
|
| Before assembling any panels, make sure the pulleys,
bearings, and other hardware fit in their notches. When satisfied, assemble
the lower-section wall panels on the floor pan.
Add the aluminum siding, to the lower section only, after
filling all voids in the frame with 1" insulation. Don't side the upper
section until after it's been placed over the lower section - too much
weight for you to lift.
Cut siding (including window openings) to the exact dimensions
of the frames and nail, at the edges only, with 3/4" screw nails. Working
with the aluminum panels isn't difficult after a little practice. They
cut easily with metal snips, but here's an easier method:
Mark intended cuts with a felt-tipped pen, tracing the
outline of a frame as the siding is held against it. Scribe these lines
with a sharp knife or razor knife. Bend the metal away from the cut, then
back. It will pop apart, leaving a clean cut. |
|
|
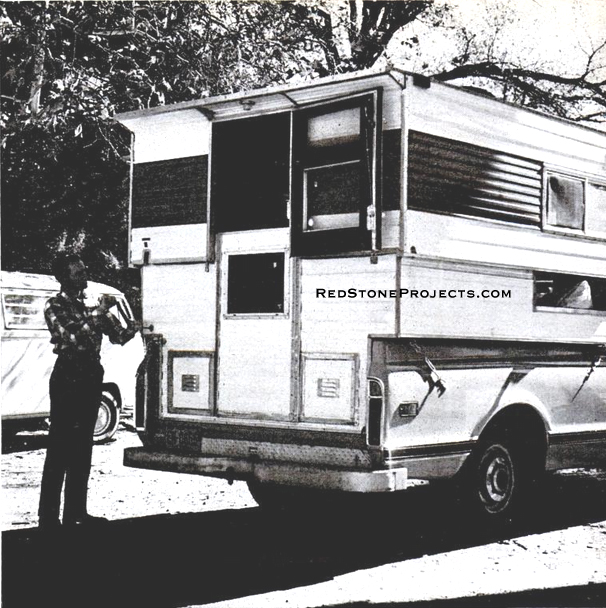
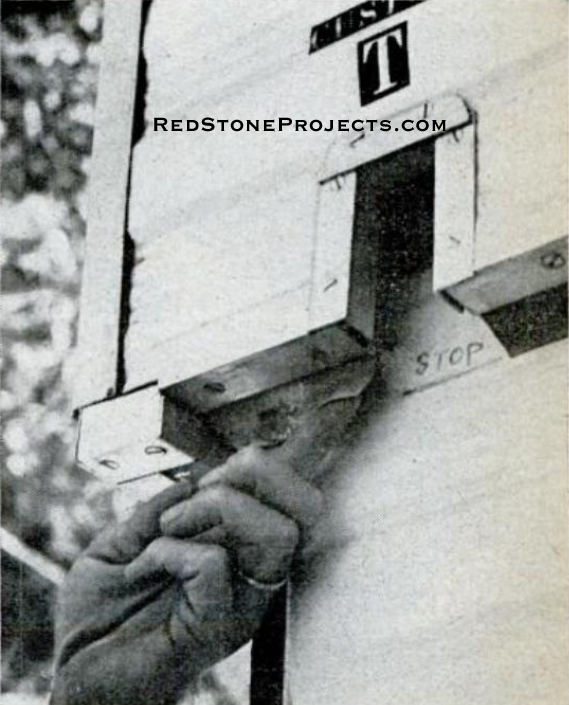
Rubber weather seal all around the edge of camper's
upper section keeps wind and bugs out. Notch clears winch handle.
|
| Windows and exterior trim come next. Seal all joints
with waterproof putty. Drill through front and rear panels for the pulley
axle bolts. Put in winches and lifting cables, leaving 3 feet of cable
extending beyond each corner pulley.
Before installing siding on the top section, get some
friends to help place it over the lower section. Use 2" fiberglass batts
in the roof. Cover the roof and front with one piece of roof roll.
Raising The Roof
The upper section should now be resting with its lower
edge about 1/4" below the side panels of the lower section. The upper cabinets
support the top section when they bear against the tops of the lower wall
panels. |
|
|
Camper jacks work in the normal way, just make
sure that they bear on the lower section, and not the upper one.
|
| Thread the cables through the clamp plates and weight
them (a brick is fine) as you slowly crank the winches until 18" of cable
is on the drums. Install a clamp on each cable; keep the four at equal
distances from the plates.
Continue raising until the inside height is no more than
74", then lower about 6". Lock the winches. This is a good position to
check for even cable length: Measure between lower panels and ceiling.
Variations up to 1 inch don't affect operation. Any more and you should
lower the top all the way and reposition the cable clamps.
Finish off with the sealing strip around the upper section,
corner molding, wiring, and the doors. The doors can be solid ply, or built
up like the walls. Leave room for weather strips and the 1-inch-wide piano
hinges. Lock hardware will depend on personal preference.
The interior shown in the photographs is based on a 1969
Chevrolet pick-up. You may want to try an entirely different layout. If
so, remember that the rear wheel wells intrude on the truck box, to the
camper is narrow in front.
Keep in mind that interior accommodations could have
been constructed even before the walls were added to the lower section.
Or you can build them in last.
Away We Go
To put the camper on your truck, first winch up the top
and block it up (with 3" blocks on interior ledges) no the upper section
will clear a pair of standard camper jacks. As with all jacks, exercise
great care. Back the truck under the camper - carefully. Lower the camper
and fasten it to the truck bed. I used two bolts through the front of the
floor and four turnbuckles outside. Remove the blocks, hook up the electricals,
and that's it.
You're ready for the road. |
Any 2 Vintage Trailer Plans
$19.95 FREE Shipping |
|
Select 2 Vintage Travel Trailer Plans
|
|
|