Free Shipping on All U.S. Orders
All Orders Processed on a Secure Server
Build a Jeep Woody Station Wagon
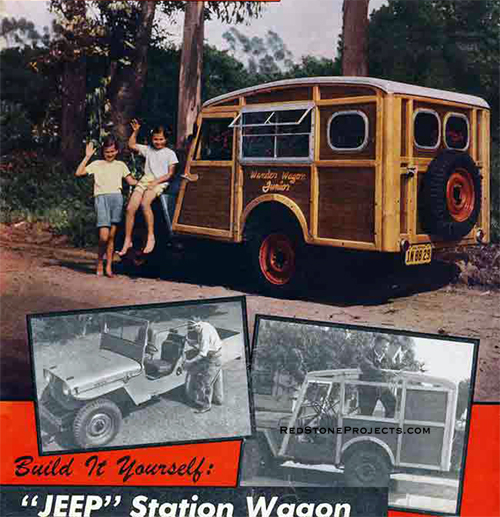
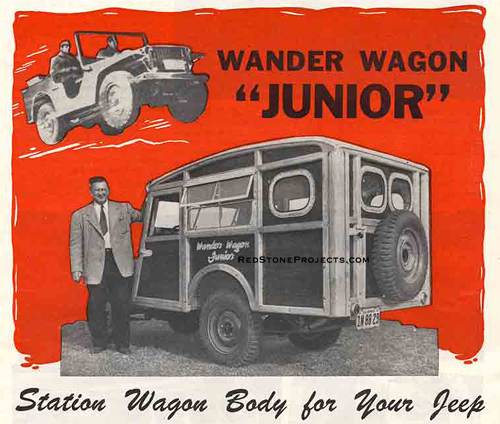
Plans for a Vintage Wood Jeep Camper Body
| HERE'S a building project that will dress up that "work
horse Jeep" of yours fit to enter any kind of society. It will not only
look "classy" but will provide the best little outdoor car that any man
could possibly want. |
| Let's take a quick look at what it offers. Interior space
is approximately 5 ft. x 8 ft. and provides on occasion seating for eight
or more persons or full-length bunks for two. Under the rear seat is plenty
of room for complete commissary which can be used either inside in bad
weather or on the tail gate when balmy breezes beckon. |
| There is plenty of storage space for a couple of persons
to travel anywhere there is a faint semblance of a road. And even better
than that - any ex-G. I. will corroborate this - if the rocks and ditches
aren't too big you don't even need a road!
It is a project entirely within the limitations of the
home workshop: even the site equipped with only a good set of hand tools
can produce a good job. However, since most of the lumber is usually purchased
rough, if you are without power tools some preliminary milling will be
necessary. |
|
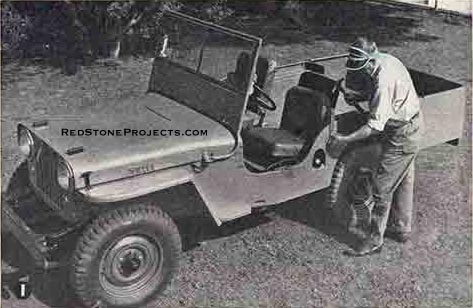
Photo 1. Stripping off protruding metal parts.
|
|
| Junior Wanderer woody wagon was built on a civilian Jeep
chassis, although the military job can be used just as satisfactorily.
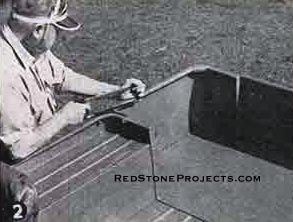
In order to get the additional length, a two-foot extension must be built
on the rear of the standard body. Any good metal shop can do the job following
the general plan as shown in Photo 2.
In case you plan to build just like the original it will
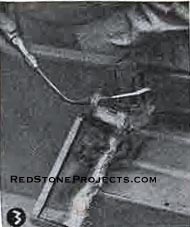
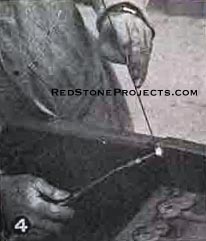
be necessary to cut out the metal just above the rear wheel housings as
shown in Photos 3 and 4. Left in, this hump would be right in the middle
of a sleeper's back! For a job which is to have seating capacity only,
this metal cutting is not necessary. |
|
Photo 2. Adding the 2-foot rear extension.
|
|
| Estimates as to the time required to build Junior can
vary, but one man working full time for three weeks could probably do the
job quite easily.
You will note that the designs show a portion of the top
to be convertible, while the photos show it solid. This was done because
the builder plans to carry a boat atop Junior and the convertible feature
could not be used. However, the construction is not too difficult a job
as will he shown in the plans. It is plenty large enough for front seat
occupants to "see the scenery" if they so desire. |
|
Photos 3 and 4. Removing material above rear wheel
wells.
|
| In regard to the extension, the builder who does not
wish the bunk or eight passenger features, can build the same type of body
on the short, regular chassis. The height of the roof can be brought down
about 6 inches in this case as the headroom shown in the plans is necessary
only when passengers are to be seated on cushions atop the wheel housings.
Materials for building can be obtained from any good lumber
yard, hardware store, and trailer supply house, including the double-opening
aluminum windows, oval stationary windows and lock and hinge hardware. |
|
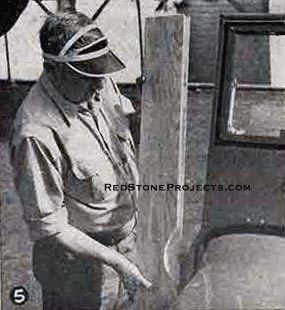
Photo 5. Fitting windshield side pillars.
|
|
| Buts let's get to work. First it is necessary to strip
off all protruding metal parts (Photo 1), so that the body panels can lie
flat. In the civilian model it is relatively simple, a good cold chisel
sufficing, but the military chassis may require some hack sawing or even
torch work. Do not try and cut any flat welded pieces entirely; just notch
out the wall panels slightly to receive their slight projections.
Fitting the pieces around the windshield requires some
nice work. Take the pair of pieces 4 ft. long and 7 in. wide, saw and gouge
out to fit fairly closely along the windshield sides down flush with the
short tail section of fender running board. |
|
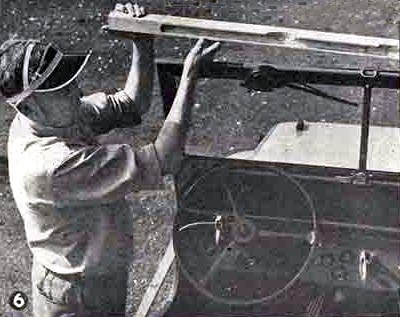
Photo 6. Fitting the top windshield crossmember.
|
|
| Allow about 3/16 in. clearance between metal and wood
for the insertion of strips of heavy felt and mastic to waterproof and
squeak proof the joints. This felt and mastic is used whenever a wooden
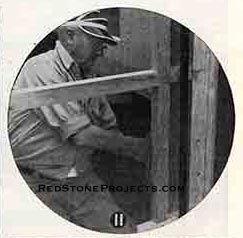
panel is bolted to the metal body (Photo 11). |
Get a restored copy of these vintage Jeep Woody Wagon
Camper Plans with 18 Pages of Enhanced and Enlarged Figures and
Illustrations and Searchable Text.
All Orders Processed
On a Secure Server
|
Jeep
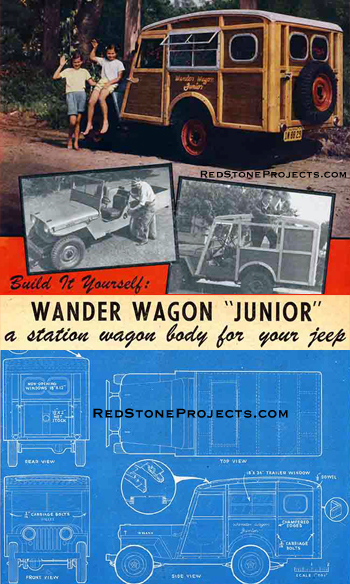
Woody Camper Front, Rear, and Side Elevations with Plan View
|
|
When these two side pieces are fitted and bolted with
5/16 in. carriage bolts, cut a piece of 1 1/2 in. x 2 in. stock for the
top gouged out as shown in Photo 6. This is felted, masticed and then doweled
and glued securely to the top edge of the side pieces. (Photo 7 and Front
Elevation.) |
|
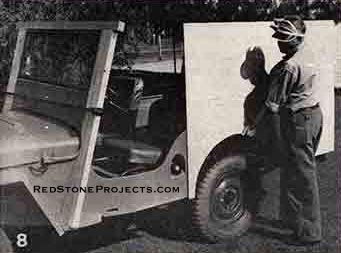
Photo 8. Fitting the side panels.
|
|
| Use a good heavy mix of waterproof glue whenever a joint
is made for Junior.
Along about this point you will probably note the absence
of minute measurements on the plans. These have been left out as each piece
will have to be individually fitted to the slight variations that occur
in each separate body. The original drawings were done 1 in. to 1 ft. and
you can work out your own scale by checking the reproductions against a
known measurement - the side windows, for example, are 18 in. x 34 in.
- and thus calculate rather closely the important dimensions.
Next, take a piece of the 4 ft. x 6 ft waterproof plywood
and hold it against one side of the body as shown in Photo 8. The front
edge becomes the rear framing of your door and in the civilian job comes
just at the rear edge of the gas filler cap. Scribe the arc of the wheel
housing and the slight kickup of the rear extension. Cut it off at the
rear flush with the back line of the body. Plan your side window openings
to come in the top forward corner of this piece.
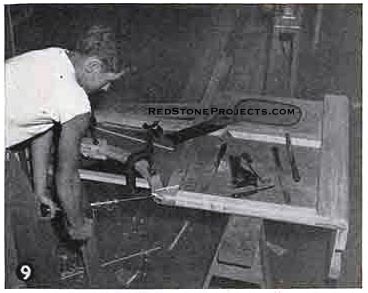
Then build up a pair of corner angles using four-foot
pieces of stock 4 in. and 5 1/2 in. side as shown in the side elevation
and the detailed circle insert. Glue and dowel well and round off the corners
nicely. These pieces may be rabbeted 1 in. wide and 1/2 in. deep on the
outside center for improved appearance. Check the exact measurements from
the side wall to the edge of the tail gate opening and cut a 4 ft. section
of plywood to fit. |
|
Photo 9. Building up the corner pieces.
|
|
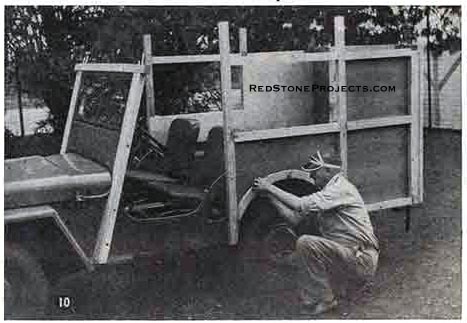
| Take the waste sections in the shop add build up the
framing with the 1 1/2 in x 2 in. stock and the heavy corner pieces as
shown in the drawings and in Photos 9 and 10. The two perpendicular center
pieces should be left long as shown. Use plenty of glue and dowels. Half
lap joints were always used for wooden body construction by old time builders
and you may use them if you desire. However. modern glues and the heavy.
short-span design of Junior makes doweling perfectly satisfactory. |
|
Photo 10. Building up the side framing.
|
|
| In mounting the sides to the chassis use felt strips
between wood and metal and carriage bolts in the place shown. Check the
exact spots before you drill for ease in drawing up the nuts tight and
making the body solid.
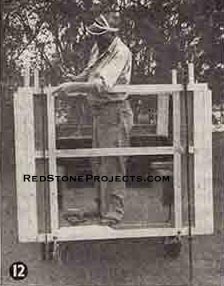
Photos 11 and 12 and the rear elevation show rather clearly
the framing at the rear. The top piece of 1 1/2 in. x 2 in. stock is cut
off to allow for the 1 1/2 in. thick timber which will be used to make
the roof fore and aft arch. |
|
Photo 11 and 12. Rear framing detail.
|
|
Clamp one of the 1 1/2 in. x 8 in. x 8 in. pieces along
the top of the side as shown in Photo 13 and scribe out the top roof lines.
Standoff at a distance and make sure it looks good. A thin bending strip
held for a marker will help smooth out the lines. Band saw to shape, then
use a
marking gauge to get the lower edge 3" below the top
except at the rear where it widens out to 5 1/2 in. Photo 14 shows how
it looks when finished. Try this piece on the other side where it should
fit if you have kept your body all squared up. Cut another similar section
for that side. |
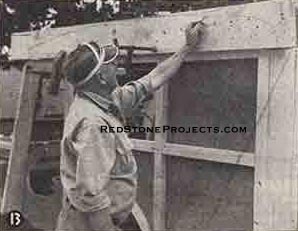
|
Photo 13. Scribing the roof lines.
|
|
These sections are doweled and glued to the upright timbers
which have been cut at the right angle to take them smoothly. When fitted
they are rounded off with drawknife and wood rasp as shown in Photos 14
and 15. Leave about a half inch on top flat to take the 1/4 in. plywood
roof which in turn is feathered off to make a smooth corner.
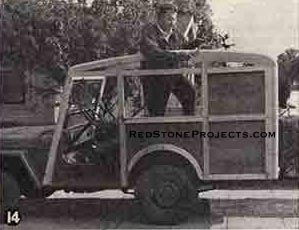
|
Photo 14. Rounding the roof line.
|
|
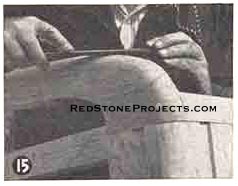
|
Photo 15. Rounding the corners.
|
| Next fill in the longitudinal pieces on each side over
the large side windows and over the doors with 1 1/2 in. stock. Dowel and
glue as before. Take special care in notching out the joint with the windshield
section, as poor work here will result in body creaks later. The finished
Junior developed its only body creak at this point, but this worked out
before very long. Use the scrap pieces of plywood cut from the window area
to fill in the paneled walls of this upper section.
Roof beams am cut of 1 in. stock and crowned 1 in. at
the center. They should finish 1 1/2 in. deep and are bolted with iron
angle braces 2 in. by 2 in. as shown in the detail of the rear elevation. |
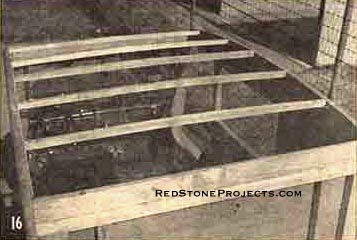
|
Photo 16. Roof cross ribs installed.
|
|
| By now you will have had everybody and his brother watching
you construct that station wagon body on your Jeep chassis. The unique
appeal and attraction of that compact little job seems to reach out to
all ages. The authentic station wagon lines will draw the attention of
some; the neat, solid looking construction will appeal to others; while
most of them will see in it the chance to really succumb to the wanderlust,
wherever and whenever it might lead.
We left off with you installing the cross ribs for the
top. When this is done take some short scraps and cut three pieces to fill
in between the last rib and the rear and the first rib and the front. See
top elevation. These are cut on the same arc as the corresponding portion
of the side timbers and are necessary to give the quarter-inch plywood
roof some additional center support where it is given quite a sharp bend. |
|
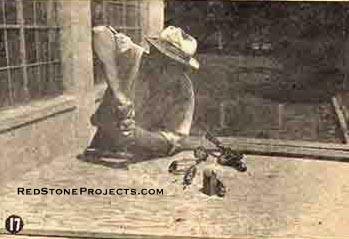
Photo 17. Installing the roof.
|
|
| The top is made of two pieces of fir plywood 4 ft. x
5 ft. The joint is made on the center rib where it is glued and screwed
with No. 6, 3/ 4 in. flathead screws every 4 inches. There is a slight
compound bend required here, but as the cross bend is only an inch it will
give no trouble. The plywood need not be soaked to take the bend.
Work from the center each way, fastening with glue and
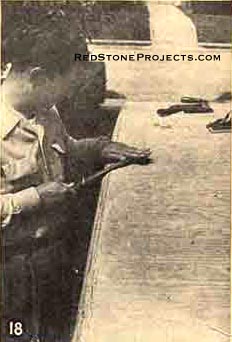
screws to each rib, see Photo 17. Where the roof plywood meets the side
timbers you may substitute galvanized or cement coated 4 penny nails spaced
every two inches. When the roof is all on this edge, feather off as shown
in Photo 18 and as you work with a rasp each nail can be pounded in a little
further, if necessary, so as to stake the corner nice and rounded. |
|
|
Photo 18. Feathering
the roof edges.
|
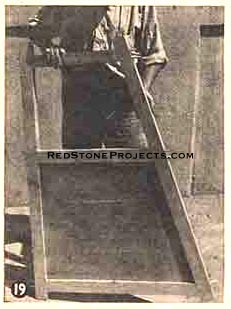
Photo 19. Door construction.
|
|
| In making a smooth roundoff at the front and rear it
will be necessary to fill in another piece of 1 1/2 in. stock beveled at
an angle according to the top curve. This in turn is drawknifed off nicely
and the roof plywood fastened to it. If you don't mind a sharper corner
this extra piece can be dispensed with and the roof plywood brought down
to the crosspieces already in place. It won't look as well, however, as
it will with the extra piece as the bend is too sharp for 1/4 in. plywood.
These pieces are shown in the top and side elevations. |
|
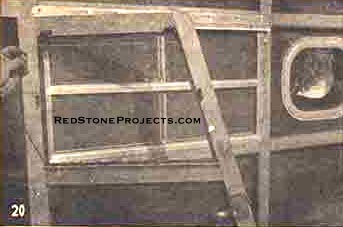
Photo 20. Door and window construction.
|
|
If you are making the convertible feature the hole should
be cut in now before the top covering is on although it can he added at
any time after the entire job is finished. Follow the drawings as shown
in the top elevation and in the detailed circle shown in front of the side
elevation. It is built like a box lid that goes over another box. A little
difficulty will be encountered because of
the arch in the roof beams but if the pieces around the
top opening are built up so they are flat on their upper edge, and then
the cover is built flat, hinging will be simple. |
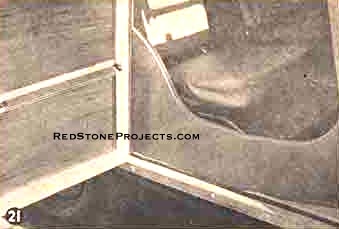
|
Photo 21. Door stops and weather stripping.
|
|
The top should be covered after the hole is cut but before
the box sections are put in. A sheet of cotton batting, obtainable in any
dry goods store, is spread out over the entire top. This batting semi-insulates
the roof and smooths out any inequalities you might have left in the plywood.
Over this is stretched the canvas which is tacked around the edges with
copper tacks. Make it as smooth as possible but don't worry too much if
it isn't perfectly smooth as the finish painting will stretch it nicely.
Tacks should come every 2 in. around the entire top. These are later covered
with the aluminum drip molding as shown in Photo 24. At the convertible
opening the cloth is drawn down and tacked to the sides of the ribs over
which the border pieces are screwed. Use plenty of mastic under these to
keep out the water. Several coats of airplane dope on the canvas will shrink
it tight and waterproof it. A finish coat of aluminum paint looks well.
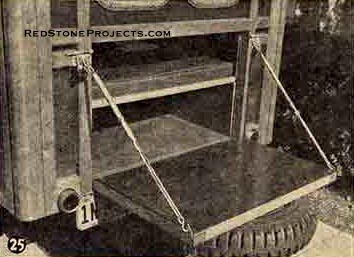
Next come the doors and the tail gate. Photos 19 and 20
show closeups of the door and window construction while Photo 25 shows
a closeup of the tailgate. For the doors, first make a cardboard or scrap
plywood template of the opening. On this mark the line of the longitudinal
middle piece of the body side and build the door over this as a pattern.
It is made of regular 1 1/2 in. stock and the door panel is rabbeted in
3/4 in. from the outside. This inside space will allow for the fold-down
window. A crank type window can be installed if desired but in this case
the door panel should be set in only 1/4 in. so as to allow space for the
winding mechanism. Salvage parts for its operation can he found in auto
junk yards.
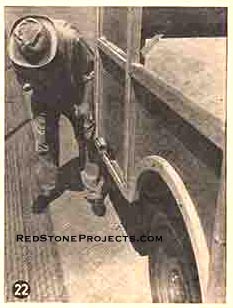
|
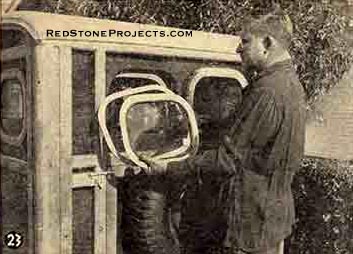
|
|
Photo 22. Chamfering the frame.
|
Photo 23. Stationary window frames.
|
|
| Hinge the door with the continuous hinge allowing 1/4
in. space for sponge rubber stripping. Stops of 1/4 in. plywood 1 1/2 in.
wide can be fitted at the top and rear edges while the front and lower
edges must be stopped with 1/2 in. square sections of material. See Photo
21. Install the hardware for handles and latch carefully as nothing is
more irritating than a car door which doesn't work perfectly.
Before the windows are installed the entire outside of
the frame sections are chamfered for improved appearance. If you have access
to a portable shaper, you're in luck, but the job can be done with a chisel
and a lot of patience. See Photo 22.
The large side windows are easy to put in. Your openings
should have been made to fit perfectly so a liberal amount of mastic and
3/4 in. roundhead brass screws every 3 or 4 in. will make a tight fit.
The stationary windows are first framed with some scrap pieces of waterproof
plywood as shown in Photo 23. One inch roundhead brass screws go through
the metal window frame, through the outside plywood frame, through the
plywood wall which has been keyhole sawed out to fit, and into the plywood
inside frame which finishes off the window inside. If you get a different
type of stationary window than the one shown just adapt the installation
to fit. |
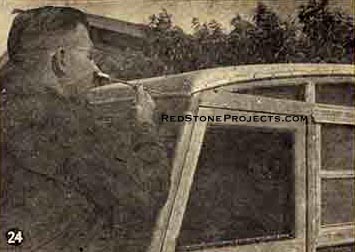
|
Photo 24. Installing aluminum drip molding.
|
|
| The door windows are made of 5/16 in. plexiglass hinged
at the bottom with a 3/4 in. continuous hinge as shown in Photo 20. Button
catches, as shown, hold the window closed against the rubber weather stripping
and also hold it from rattling when folded down. See Photo 21.
Tailgate construction and operation is shown in the rear
and side elevations and in Photo 25. The frame is built up with 1 1/2 in.
stock, doweled and glued and faced with the body plywood. A reinforcing
piece of 1 in. maple about 8 inches wide should be let into the framing
just behind the plywood if the spare tire is to be carried on the rear
as shown on Junior. The tire rack is the same one that comes as regular
equipment on the side of the civilian jeep chassis. |
|
Photo 25. Tailgate with hardware.
|
|
| The tailgate is hinged at the bottom with the balance
of the 1 1/2 in. continuous hinge and stops installed on the inside of
the body to hold the rubber weather stripping against which the gate closes.
Locking type slide bolts are fitted to hold the gate shut. See Photo 25.
Two sections of chain are fitted with S hooks on each end for supporting
the gate when down. They are completely removed when the gate is closed
so as to eliminate any chance of rattle while traveling. |
|
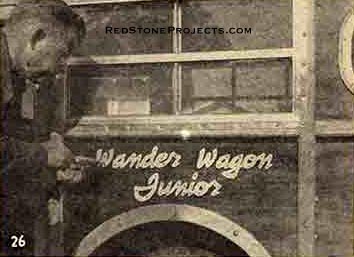
Photo 26. Applying the Wander Wagon Logo.
|
|
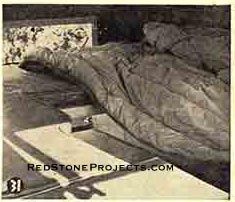
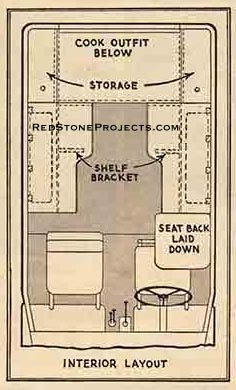
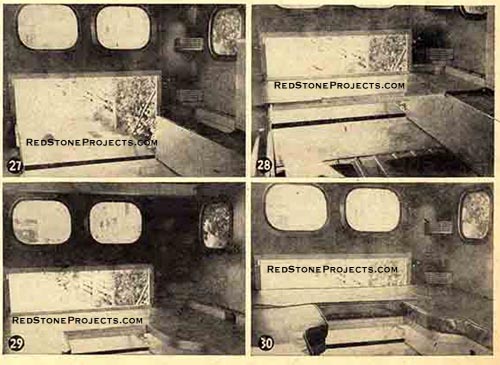
| The interior layout and Photos 27 to 32, inclusive, show
how Junior can be made to bunk two persons and seat seven or more in the
cab. One 4 ft. x 8 ft sheet of 3/8 in. plywood will make the necessary
pieces. Of course, any type of cross seating arrangement can be used to
suit the builder's fancy but the one shown makes a real "Wandering Wagon"
out of the job.
First cut the seat backs off and replace with a machined
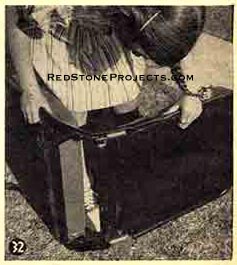
stem to fit which is brazed to the lower section. Photo 32 illustrates
this. When the bunks are made up, the seat backs are slid off the stems
and are laid flat to take the sleeper's feet as shown in the photos.
First cut two pieces of 3/8 in. plywood to extend from
the front of the wheel housings to the tailgate opening, the height flush
with the top of the wheel housings. See Photo 27. Block in the sides of
the metal body just under the rolled top edge with 1 in. stock screwed
through the metal into the wood. Fit a piece 24 in. wide, cleated front
and back, that will just fit the top edges of the longitudinal pieces.
The cook box goes under this. In each corner, fit a loose piece on side
cleats. This piece can be removed to get into the storage compartments
underneath. See Photo 28.
The side pieces are curved as shown with a thin plywood
lip on the outer edge to retain the cushions and hinged against the walls.
A heavy shelf bracket is bolted to these pieces for extra support when
used as a seat. |
|
Jeep Woody Interior Layout
|
|
| Latex cushions, made to order by any large mattress factory
or store, are most satisfactory although good cotton or kapoc pads will
suffice. |
|
Photos 27 through 32. Interior arrangements for
seating and sleeping.
|
|
| The cook has is made to fit the opening under the rear
seat and is approximately 2 ft. x 4 ft. x 10 in. deep. I put a built-in
ice box in mine, but a removable factory-made box is quite satisfactory.
This box can be used either on the tailgate in good weather or inside for
"Jupe Pluvius".
Racks and shelves for fishing rods, guns, etc., can be
installed wherever desired on the walls. A dome light placed as shown in
the top elevation comes in mighty handy. |
|
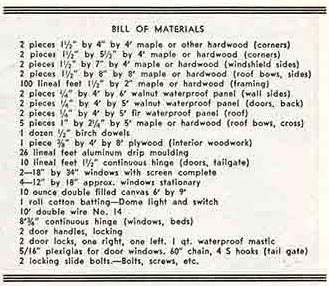
Wander Wagon Junior Bill of Materials
|
|
| Outside finish should be two coats of shellac, well rubbed,
and two coats of good quality spar varnish. One coat of shellac and two
of varnish are sufficient for the inside. The outside should be redone
twice a year or oftener if exposed to much inclement weather. |
|
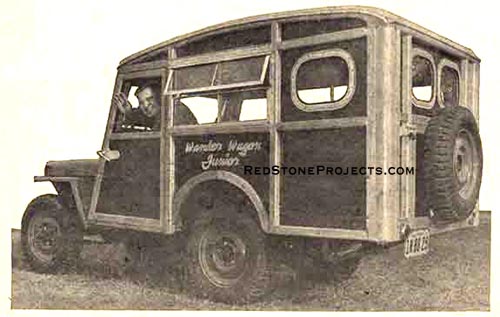
Completed Wander Wagon Junior
|
|
Any 2 Vintage Trailer Plans
$19.95 FREE Shipping |
|
Select 2 Vintage Travel Trailer Plans
|
|
|


