Free Shipping
Telescoping Cabin Trailer Plans
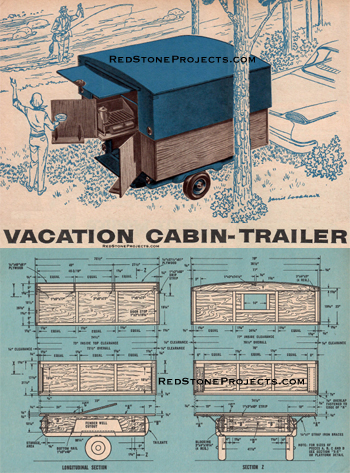
Build a Vintage 1960 Vacation Cabin Trailer
|
Telescoping Cabin
Trailer Plans
Build a Vintage 1960
Vacation Cabin Trailer
 |
PDF Format |
|
|
All Orders Processed
On a Secure Server
|
Price $12.95
|
|
Get a restored copy of these vintage Telescoping
Cabin Trailer Plans with 22 Pages of Enhanced and Enlarged Figures
and Illustrations and Searchable Text.
|
We will email these plans, to the address provided
with your payment, within 48 hours following receipt of your order.
|
|
|More
Vintage Trailer Plans|
|
|

|
|
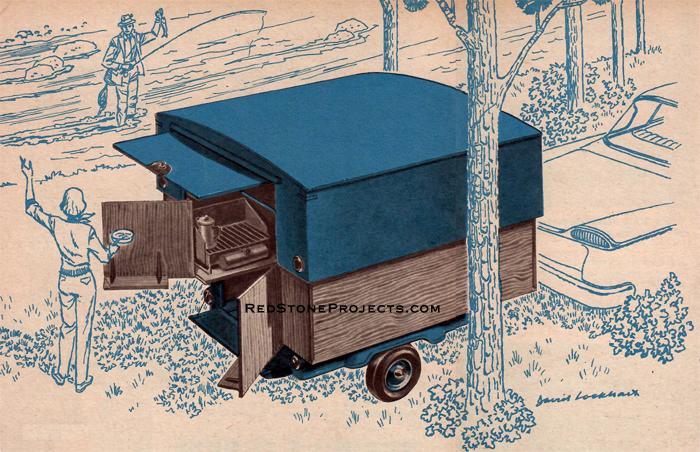
By Paul Corey
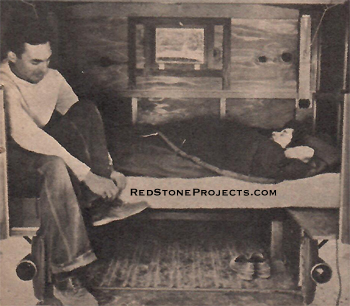
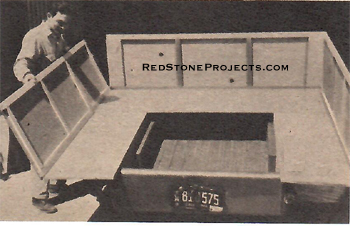
A cozy lightweight that accommodates two, then
telescopes to half-size for trailering is built on your existing utility
trailer.
|
| WHEN telescoped down for trailing behind a car, this
vacation cabin is so low and compact that you can easily see over the top
of it through your rearview mirror. When you stop for the night, special
knee-action elevators al-low the top section of the cabin to be raised
and locked in position. Once open, there is plenty of room inside for a
stove, a table and your camping equipment. The table folds away to provide
sleeping space for two. And the whole unit weighs less than 500 pounds!
Upon returning from your vacation, simply unbolt the cabin
from the trailer, set it in place on fixed supports in the backyard, and
the trailer is once again available for hauling jobs. Even then the cabin
can serve as emergency sleeping quarters or as a playhouse for the youngsters. |
|
|
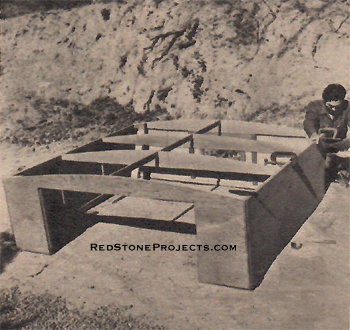
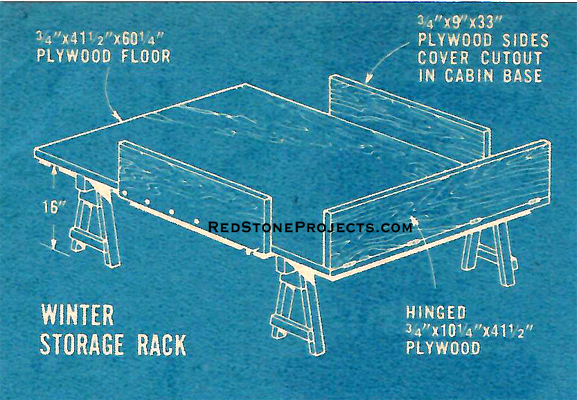
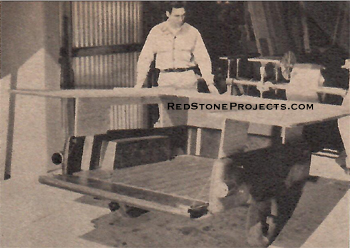
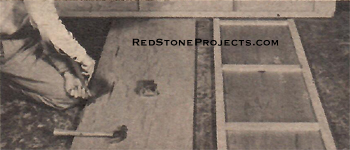
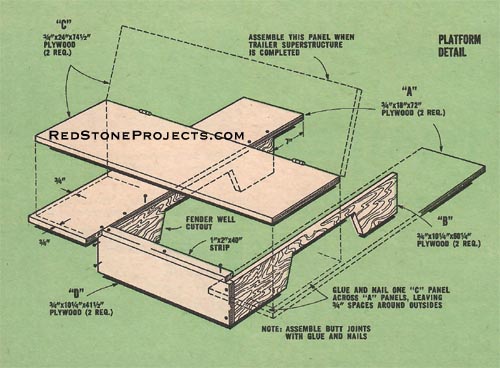
PLATFORM fits over trailer. Note fender cutouts
and blocks through which bolts pass.
|
| The platform which rests on the trailer and forms the
base of the cabin is of 3/4-inch exterior-grade plywood. The side walls,
also of plywood, are 1/4-inch stock. Before making any cuts, spend some
time studying the drawings and photographs. (Note: Although specific dimensions
are given throughout this article, chances are your trailer will not measure
exactly the same as this one and you will have to alter the dimensions
to fit. Bear this in mind before and during construction.) |

|
|
STRAP IRON BRACES bolted to sides of trailer support
horizontal sideboard panels.
|
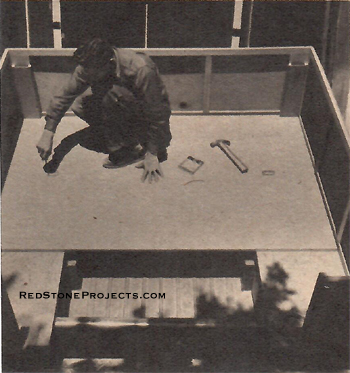
| To make the platform section, cut the plywood to size,
assemble the pieces with screws and waterproof glue and set it down over
the trailer body. Fasten it in place by bolting it to the trailer through
four hardwood blocks wedged upright along the sides of the trailer. |
 |
|
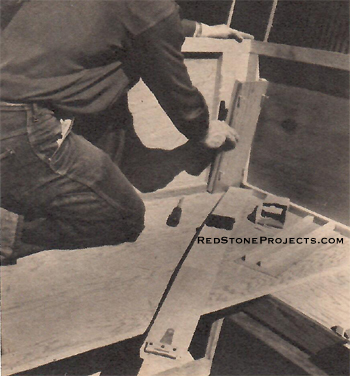
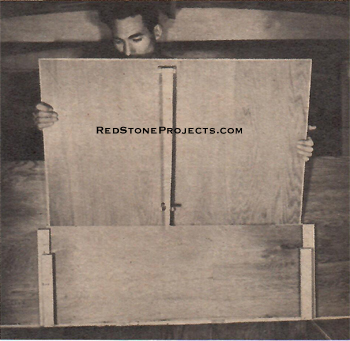
LOWER cabin sides are of 1/4-inch plywood panels
nailed to frames of 1 x 2-inch stock.
|
| Now construct the side walls for the bottom section of
the cabin. After measuring and cutting the 1/4-inch plywood panels, screw
and glue them to rectangular frames of 1 x 2-inch stock. |
|
|
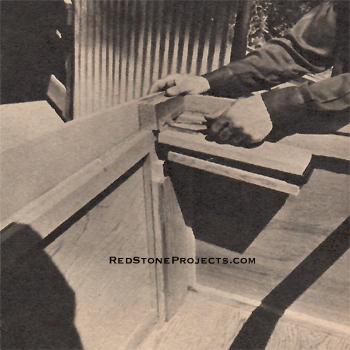
FIX FRAMES to platform with wood screws turned
through overlapping plywood edges.
|
| Fasten these five panels to the platform by drilling
a series of pilot holes through the plywood lips that extend, where indicated,
beyond their frames. Attach the forward panel first, then the sides and
finally each of the two end panels. |
|
|
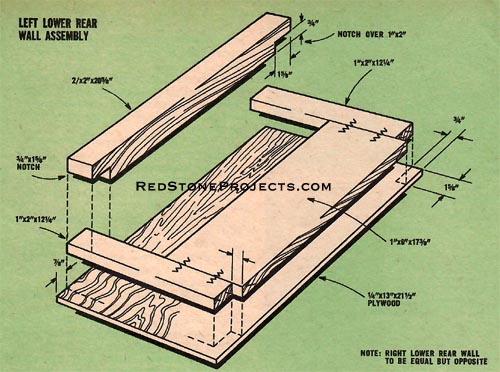
LOWER REAR WALL assemblies are screwed and glued
to platform and sides.
|
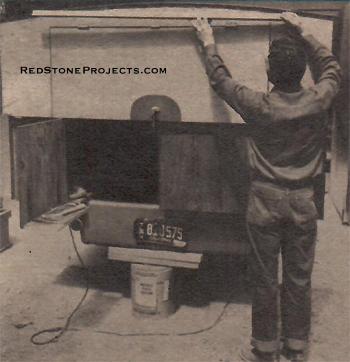
| Now proceed to the construction of the upper section
of the cabin. This is the section that will be raised and lowered when
the cabin is opened for use or closed for travel, so tolerances should
be as close as possible without impeding what ought to be a simple telescoping
action. |
|
|
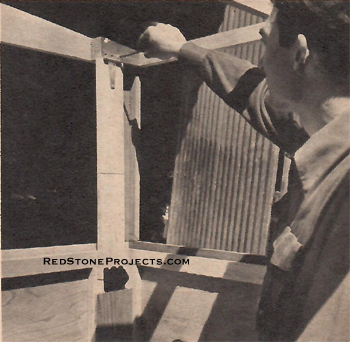
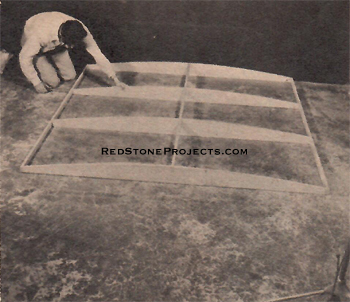
CABIN ROOF FRAME is the first portion of telescoping
top section to be assembled.
|
| During the building of this section make frequent comparisons
of its dimensions with those of the lower trailer section so that you can
correct any miscalculations that could cause the upper half to end as a
"top hat" that doesn't fit. |
|
|
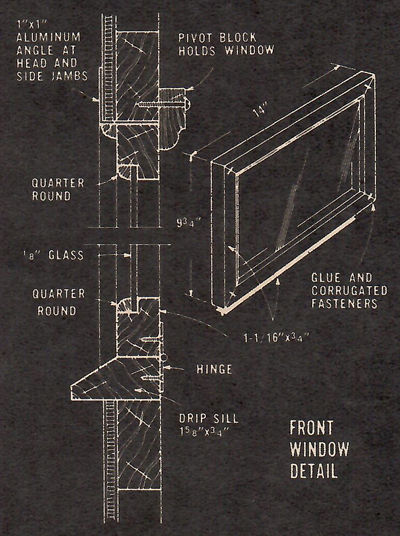
Platform Detail
|
| When you've completed the frame, fasten the plywood panels
to it. Secure the end panels first, then the side panels so that the ends
of the end panels will be lapped. |
|
|
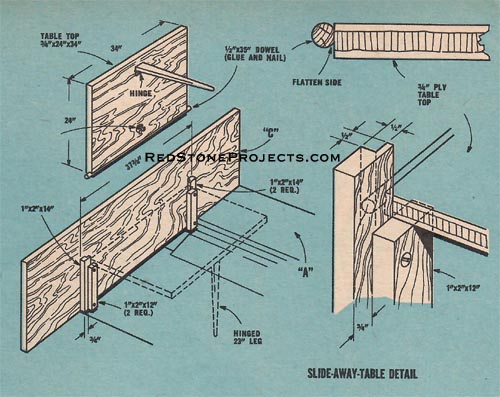
Slide-Away Table Detail
|
| Four hinged elevators support the top section when it
is open and permit it to be telescoped down when not in use. These elevators
are supported in wooden sleeves installed at each bottom corner of the
cabin. |
|
|
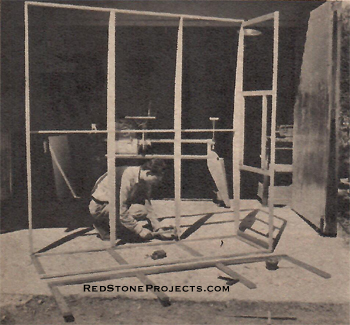
TOP SECTION assembly begins to shape up with the
addition of side wall frames.
|
|